How to Texture a Wall: A Step-by-Step Guide for a Professional Finish in Your Kitchen Home Remodel
Wall texture is one of those finishing touches that can completely transform a space. Whether you're refreshing a single room or upgrading your entire home, learning how to texture a wall gives you the
Wall texture is one of those finishing touches that can completely transform a space. Whether you're refreshing a single room or upgrading your entire home, learning how to texture a wall gives you the ability to add depth, character, and a polished look that paint alone can't achieve. For homeowners in Mesquite, Nevada and throughout Southern Nevada, wall texture choices also play a practical role in managing the desert climate's effects on interior surfaces.
While many homeowners take the DIY route, the key to a great result is understanding the process, choosing the right texture, and knowing when a project might benefit from professional input. This guide walks you through everything you need to know.
What Is Wall Texturing and Why Does It Matter?
Wall texturing is the process of adding a pattern or finish to drywall using joint compound or specialized materials. Instead of leaving walls completely smooth, texture introduces subtle or dramatic variation that enhances visual interest.
There are several practical reasons people choose to texture their walls:
It helps hide minor imperfections like dents, seams, or patches
It adds depth and dimension to otherwise flat surfaces
It can create a more custom, high-end look
It improves durability in high-traffic areas
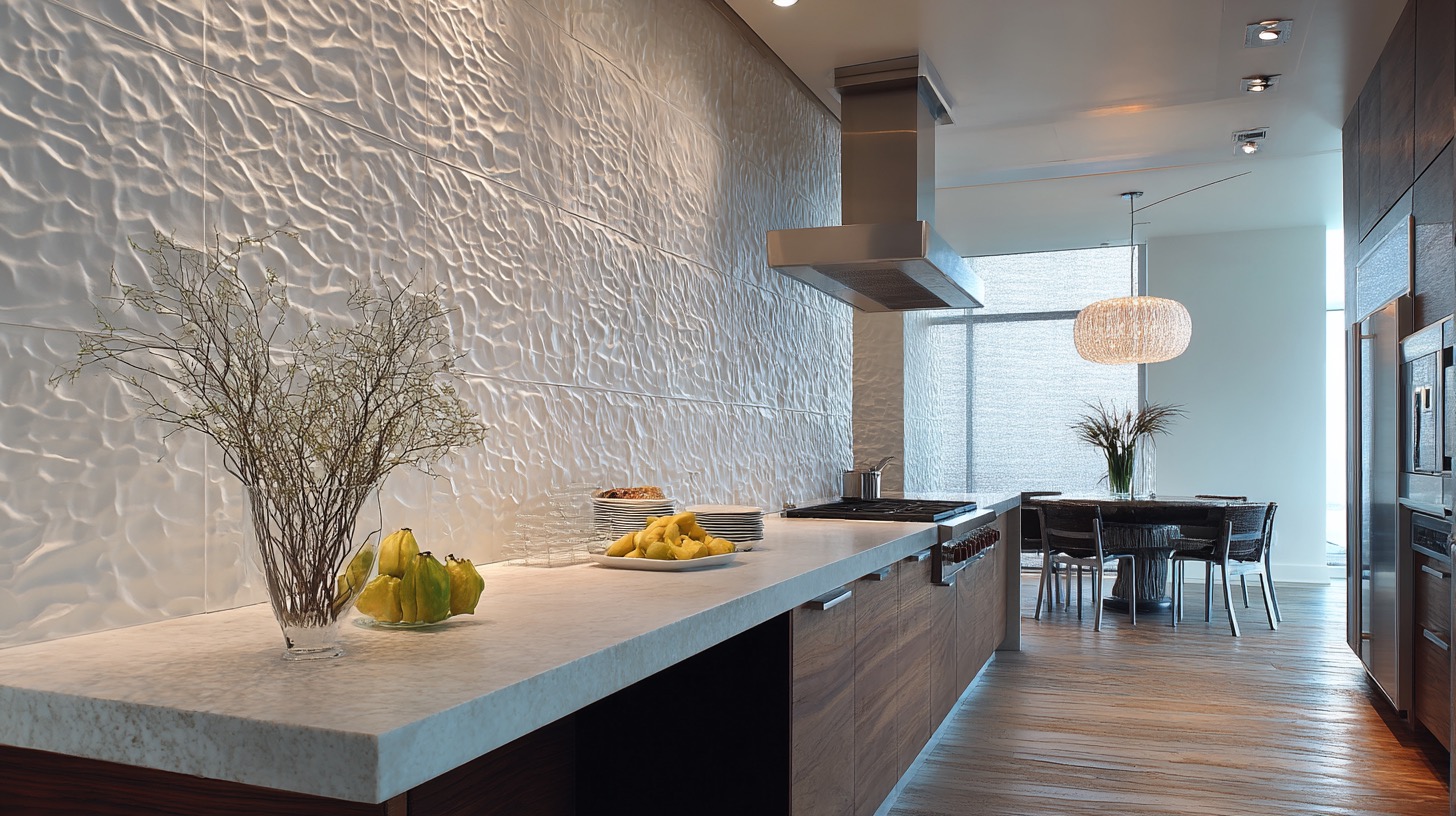
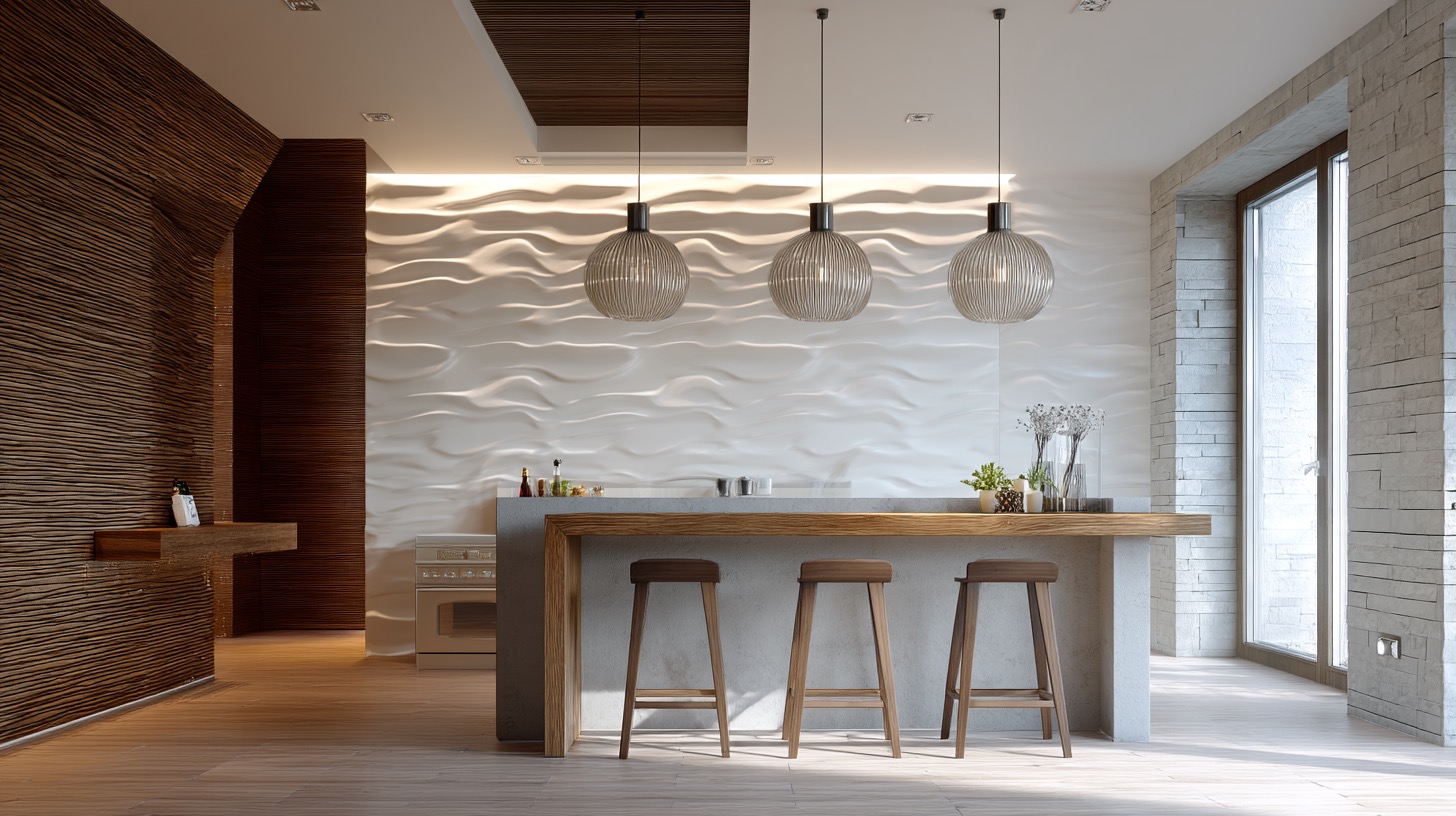
Textured walls are especially popular in living areas, hallways, and kitchens, where both durability and design matter. In Nevada homes, textured finishes are particularly common because they hold up well in low-humidity environments and help mask the minor settling cracks that desert construction sometimes produces. In renovation projects, texture often plays a key role in tying together cabinetry, lighting, and overall interior style.
Popular Types of Wall Textures to Consider
Before you start, it's important to choose a texture that matches your space and skill level.
Orange Peel Texture
This is one of the most common textures, known for its subtle, slightly bumpy finish. It's modern, clean, and forgiving for beginners.
Knockdown Texture
A step beyond orange peel, knockdown involves flattening the texture slightly after application. The result is a soft, layered look that works well in contemporary homes. Knockdown is one of the most popular wall textures in Nevada new construction and remodels throughout Mesquite, Las Vegas, and Henderson.
Slap Brush Texture
This technique uses a brush to create bold, random patterns. It's more dramatic and often used for ceilings or accent walls.
Skip Trowel Texture
A more advanced technique, skip trowel creates a hand-applied, Mediterranean-style finish. It's often seen in upscale interiors and requires more skill to execute well.
Tools and Materials You'll Need
To get started, gather the following:
Joint compound (pre-mixed or powder)
Drywall knife or trowel
Roller or texture sprayer
Paint roller frame and covers
Drop cloths and painter's tape
Sandpaper (medium and fine grit)
Primer and paint
Having the right tools is essential. The quality of your application depends just as much on your preparation and materials as it does on technique.
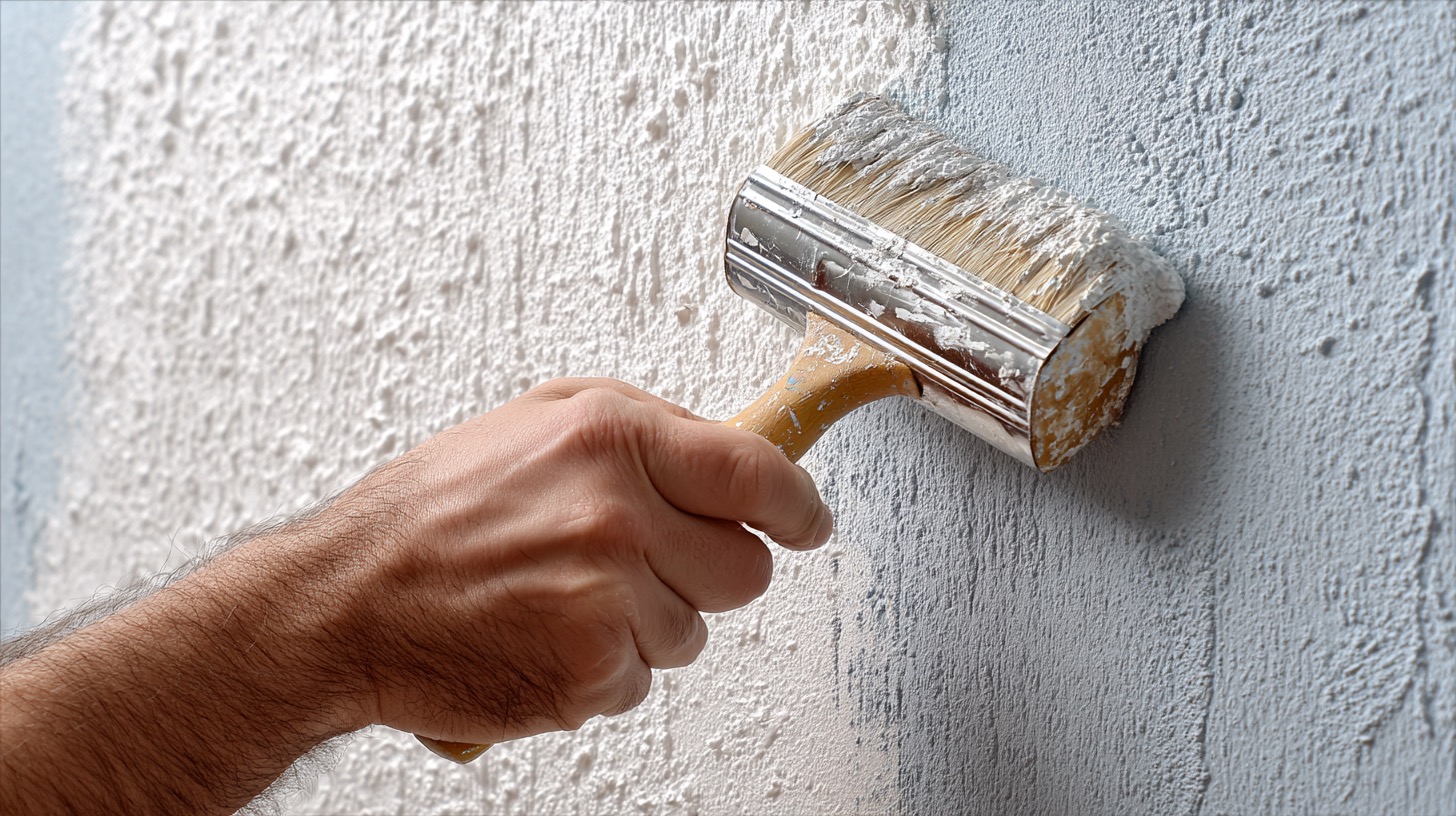
Step-by-Step: How to Texture a Wall
Step 1 – Prepare the Surface Properly
Preparation is where most DIY projects succeed or fail. Start by cleaning the wall to remove dust, grease, or debris. Repair any holes or cracks with patching compound, then sand the surface until smooth.
Once repairs are complete, apply a coat of primer. This helps the texture adhere evenly and prevents inconsistencies in the final finish.
Step 2 – Mix the Joint Compound
The consistency of your joint compound matters. For most textures, you want a mixture similar to pancake batter, not too thick and not too runny.
If the mixture is too thick, it won't spread properly. Too thin, and it won't hold the texture. In dry desert climates like Mesquite and Southern Nevada, the compound can dry faster than expected, so work quickly and keep your mixture slightly more hydrated than the instructions suggest. Take your time here and mix thoroughly to avoid lumps.
Step 3 – Apply the Texture
This step varies depending on the technique you've chosen:
Spray Method: Best for orange peel textures, using a hopper gun or sprayer
Roller Method: A great option for beginners applying light textures
Hand Application: Used for knockdown, slap brush, or skip trowel finishes
Work in manageable sections to maintain consistency. Keep your movements steady and avoid overworking the material.
Step 4 – Customize the Finish
Timing is critical, especially for techniques like knockdown. After applying the texture, wait a short period before lightly flattening the peaks with a drywall knife.
This step determines the final look, so test your timing on a sample surface first. Small adjustments in pressure and timing can significantly change the result.
Step 5 – Let It Dry and Finish
Allow the texture to dry completely, which typically takes 24 hours depending on thickness and humidity. In Nevada's arid climate, drying times can be significantly shorter, sometimes as fast as 12 hours, so check early. Once dry, lightly sand any sharp edges or imperfections.
Apply a coat of primer, followed by your chosen paint color. This final step brings the entire look together and enhances the texture's depth.
Common Mistakes to Avoid When Texturing Walls
Even simple textures can go wrong without the right approach. Here are some common mistakes:
Skipping proper surface preparation
Using the wrong compound consistency
Applying texture too thick or unevenly
Not testing the technique beforehand
Trying to fix sections after they've started drying
Taking the time to practice on a scrap surface can save you from costly or time-consuming corrections later.
DIY vs. Professional Wall Texturing: What's Right for You?
Texturing a wall is a project many homeowners can handle, especially for small areas or simple finishes. If you're working on a single room or experimenting with a subtle texture, DIY can be a rewarding option.
However, larger projects or high-visibility areas often require a higher level of precision. Kitchens, for example, demand a consistent, polished look that complements cabinetry, countertops, and lighting.
For homeowners planning a larger renovation, especially in high-traffic areas like kitchens, it often makes sense to work with experienced professionals such as Kitchen Search to ensure the wall texture aligns seamlessly with cabinetry, lighting, and overall design.
How Wall Texture Fits Into a Full Home or Kitchen Remodel
Wall texture isn't just a finishing detail. It plays a significant role in the overall design of a space.
The type of texture you choose can affect how light reflects, how large a room feels, and how well different elements blend together. In kitchens, for example, a subtle texture can soften modern cabinetry, while a more pronounced finish can add warmth to minimalist designs.
When wall texturing is part of a full upgrade, collaborating with a remodeling specialist like Kitchen Search can help ensure every element, from wall finishes to layout design, works together for a polished result.
Pro Tips for a Flawless Finish
To get the best results, keep these tips in mind:
Always test your texture on a sample board before applying it to your wall
Work in small sections to maintain consistency
Keep your tools clean to avoid unwanted patterns or buildup
Match existing textures carefully when repairing walls
Maintain steady lighting so you can spot inconsistencies early
Consistency is the key to a professional-looking finish. Small details make a big difference.
Conclusion
Learning how to texture a wall opens up new possibilities for improving your home's interior. With the right tools, preparation, and technique, even beginners can achieve impressive results.
Start small, practice your method, and build confidence as you go. And if your project expands into a full remodel, understanding how texture fits into the bigger picture will help you create a space that feels cohesive, intentional, and professionally finished. For homeowners in Mesquite, Nevada and surrounding communities, wall texturing is one of the most impactful and cost-effective upgrades you can make when preparing a home for sale or simply improving your living space.
Homes for sale in Mesquite, Nevada
Thinking about a move to Mesquite?
Browse every active listing — Sun City 55+, golf-course homes, new construction and more — updated multiple times a day. Or talk to a local agent who knows the neighborhoods.
Keep reading
More from the blog
How to Create a Backyard You'll Actually Love

How to Calculate Whether a Mesquite Rental Property Is Profitable
Which Electric Chainsaw Works Best for Small Property Jobs?