How to Construct a Tiny House: A Practical Guide to Planning, Land Surveying, and Working With a Tiny Home Builder
Tiny houses have become a popular option for people who want a simpler, more efficient, and more flexible way to live. Some homeowners see them as a way to create guest space. Others want a small renta
Tiny houses have become a popular option for people who want a simpler, more efficient, and more flexible way to live. Some homeowners see them as a way to create guest space. Others want a small rental unit, a private home office, or a comfortable place for family members. But while tiny houses are small in size, building one still requires serious planning.
If you are wondering how to construct a tiny house, the process starts long before framing walls or choosing finishes. A successful tiny house project depends on zoning, permits, site conditions, utilities, design, code requirements, and the intended use of the space.
Whether the home will be built on wheels, placed on a permanent foundation, or designed as an accessory dwelling unit, the goal should be the same: create a safe, legal, comfortable, and functional living space that works for the property and the people using it.
What Does It Mean to Construct a Tiny House?
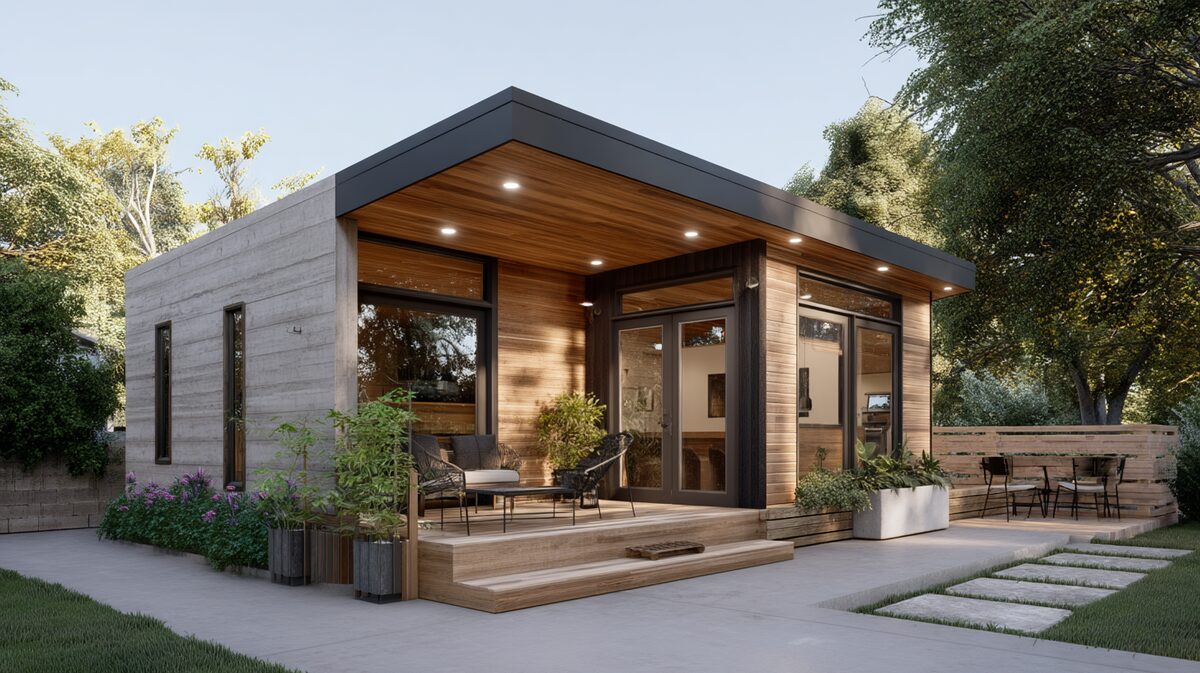
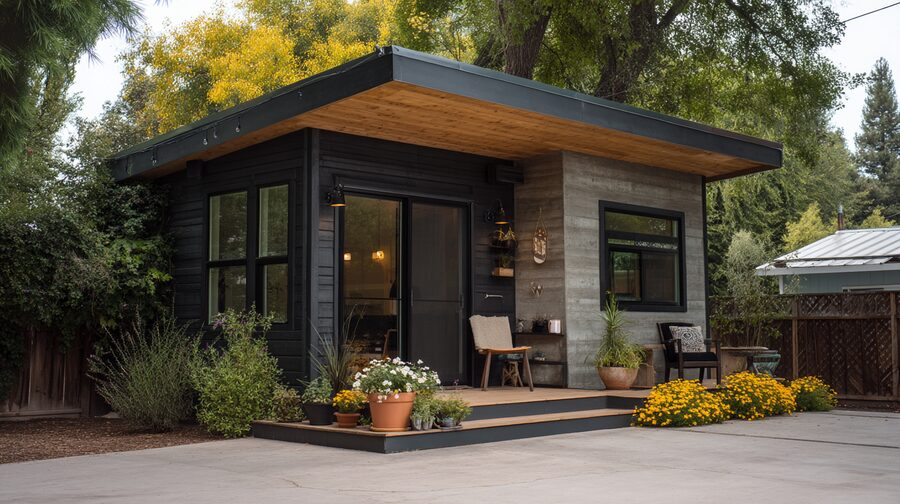
Constructing a tiny house means building a compact living space that includes the essentials of a home in a smaller footprint. Most tiny homes include a sleeping area, bathroom, kitchenette or kitchen, storage, utilities, and a living area.
However, not all tiny houses are treated the same. Some are built on trailers and designed to be movable. Others are constructed on permanent foundations and must meet residential building codes. Some are built as accessory dwelling units, also known as ADUs, on properties that already have a main home.
The type of tiny house you build affects the entire process, including permits, financing, utilities, foundation, inspections, and how the home can legally be used.
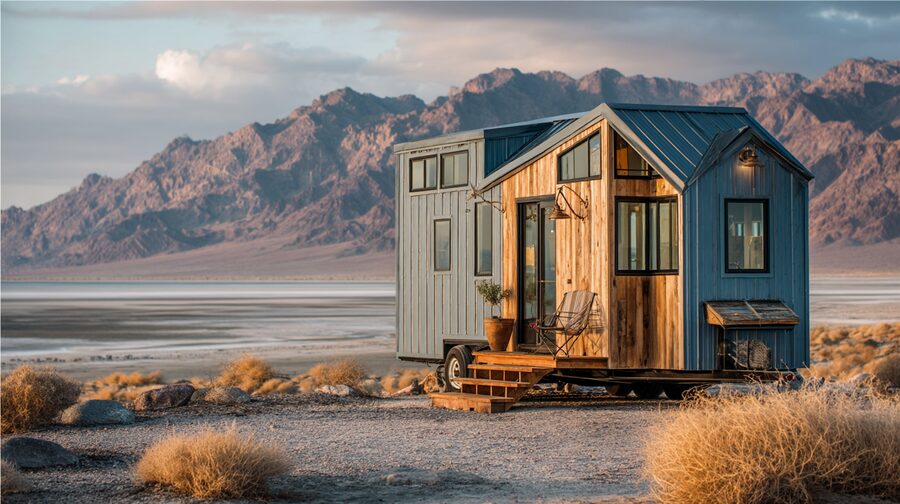
Tiny House on Wheels vs. Permanent Tiny House
A tiny house on wheels is built on a trailer base. It may be movable and is often treated differently than a permanent dwelling. Depending on the local rules, it may be classified more like an RV than a traditional home.
A permanent tiny house is built on a foundation and is intended to function as a long-term residence. This usually means it must meet building codes for structure, plumbing, electrical systems, insulation, fire safety, energy efficiency, and occupancy.
Before choosing either option, property owners should check local rules. A tiny house that works in one city or county may not be allowed in another.
Tiny House vs. ADU
A tiny house and an ADU can look similar, but they are not always the same. An ADU is a secondary dwelling unit built on the same lot as a primary home. It may be detached, attached, built above a garage, converted from an existing structure, or created inside the main home.
A tiny-home-style ADU can be a practical option for homeowners who want compact living space but also need the unit to be legal, permanent, and connected to utilities. In many areas, building a tiny house as an ADU may be the most realistic path to creating a code-compliant living space.
Step 1: Decide How the Tiny House Will Be Used
The first step is deciding the purpose of the tiny house. The intended use will shape the layout, budget, permits, utilities, and design.
If the tiny house will be used for full-time living, it needs to be comfortable year-round. That means proper insulation, heating and cooling, ventilation, storage, bathroom access, kitchen functionality, and enough space for daily routines.
If the space will be used for guests or family, privacy and accessibility may be more important. A tiny house for aging parents may need wider doorways, fewer stairs, a walk-in shower, and easy access from the main home.
If the unit will be rented, local rental laws and habitability requirements matter. A rental unit may need full permitting, safe utility connections, separate access, and code-compliant features. Rental use should never be assumed until local rules are confirmed.
Step 2: Check Zoning, Permits, and Local Building Rules
Tiny house construction is heavily influenced by local regulations. Before designing the home, buying materials, or preparing the site, property owners should confirm what is legally allowed.
Zoning rules may determine whether a tiny house can be placed on the property, how large it can be, where it can sit, how tall it can be, and whether it can be used as a residence. Setbacks, lot coverage, parking rules, occupancy limits, and utility requirements can all affect the design.
Building codes are also important. A permanent tiny home may need to meet standards for framing, foundation, electrical work, plumbing, insulation, emergency exits, fire safety, ventilation, and energy performance.
Skipping this step can lead to major problems. A tiny house built without proper approvals may not be legal to live in, rent, sell, or connect to utilities. Permit planning should always come before construction.
Step 3: Evaluate the Land and Site Conditions
Once the general rules are understood, the next step is evaluating the property. The land itself will determine what is possible.
Before finalizing a tiny house design, property owners really benefit from working with professionals such as Golden State Design and Engineering to confirm site conditions, property boundaries, and land-surveying details that can affect placement and permitting.
A site evaluation may include reviewing property lines, easements, setbacks, slopes, existing structures, trees, utility locations, drainage, and access points. These details matter because a tiny house may need to be placed in a very specific part of the lot to meet local requirements.
Soil and drainage conditions can also affect the project. Poor drainage, steep slopes, unstable soil, or limited access can increase construction costs. If equipment cannot easily reach the build area, labor and logistics may become more complicated.
Utilities are another major factor. A tiny house may need water, sewer or septic, electrical service, gas, internet, and drainage connections. If existing utilities are far from the planned location, trenching and upgrades can add significant cost.
Step 4: Design the Tiny House Layout
Tiny house design is about using limited space wisely. Every square foot should have a purpose.
Start with the essentials: sleeping area, bathroom, kitchen, storage, mechanical systems, windows, and entry points. The layout should support daily living without feeling cramped or impractical.
Storage is especially important. Built-in cabinets, under-bed storage, wall shelves, loft areas, multi-purpose furniture, and compact appliances can help make a small space more functional.
Natural light and ventilation also make a major difference. Windows, ceiling height, airflow, and lighting can make a tiny home feel larger and more comfortable. A dark or poorly ventilated tiny house can feel confined, even if the layout is efficient.
Keeping the layout simple can help control cost. Straightforward shapes, efficient plumbing walls, and fewer custom features often make construction easier and more affordable.
Step 5: Choose the Foundation or Base
The foundation or base depends on the type of tiny house being built.
For a tiny house on wheels, the trailer must be properly rated for the structure’s weight. The design must account for movement, balance, road safety, and secure attachment. This type of tiny house may be movable, but it also comes with limitations depending on where it can be parked or lived in legally.
For a permanent tiny house, the foundation may be a slab, crawlspace, pier system, or raised foundation. The right choice depends on soil conditions, drainage, local code, engineering requirements, and the design of the structure.
For an ADU-style tiny home, the foundation often needs to meet full residential requirements. This may include structural plans, inspections, utility connections, and city or county approval.
Step 6: Build the Structure
Once plans, permits, site preparation, and foundation work are ready, construction can begin.
Framing comes first. This includes the floor system, walls, roof structure, window openings, door openings, and structural layout. Good framing is essential because it supports the entire home.
Next comes exterior protection. Roofing, windows, doors, weather barriers, and siding help protect the structure from moisture and weather. Because tiny houses have limited interior space, insulation and moisture control should be planned carefully.
After the exterior shell is in place, utilities are roughed in. Electrical, plumbing, heating, cooling, and ventilation systems need to fit into tight spaces while still meeting safety and code requirements.
Finally, interior work begins. This includes insulation, drywall or wall finishes, flooring, cabinets, fixtures, appliances, trim, paint, and final details. In a tiny house, small finish choices can have a big impact on both comfort and function.
Step 7: Work With the Right Professionals
Some parts of a tiny house project may be suitable for DIY work, especially finish details, basic carpentry, painting, or owner-assisted tasks. However, work involving structure, utilities, code compliance, and permits should be handled carefully.
Electrical, plumbing, foundation, structural framing, and utility connections are not areas to guess through. Mistakes can create safety issues, delays, failed inspections, or expensive repairs.
For homeowners who want a tiny-home-style living space built as a compliant ADU, working with an experienced Tiny Home Builder can help connect design, permitting, utilities, and construction into one more manageable process.
A professional builder can also help homeowners understand what is realistic for their lot, budget, and local requirements. This is especially valuable when the tiny house is intended to be a permanent living space rather than a temporary structure.
Common Mistakes to Avoid When Constructing a Tiny House
One of the biggest mistakes is designing before checking local rules. A beautiful layout may not be buildable if it violates setbacks, zoning requirements, height limits, utility rules, or occupancy standards.
Another common mistake is underestimating site and utility costs. Trenching, sewer connections, septic systems, drainage, electrical upgrades, grading, and foundation preparation can add major expenses.
Overcomplicating the design can also make the project more expensive. Custom windows, unusual rooflines, excessive built-ins, and complex layouts may look attractive, but they can increase labor, materials, and maintenance needs.
Finally, many people ignore long-term comfort. A tiny house needs more than a clever layout. It needs proper heating, cooling, ventilation, storage, privacy, sound control, and durable materials. A space that looks good online may not work well for daily living if these details are overlooked.
Final Thoughts: Constructing a Tiny House Starts With Planning
Learning how to construct a tiny house starts with understanding that small does not mean simple. A tiny house still needs planning, permits, utilities, safe construction, and a design that works for real life.
The best projects begin with clear goals. Decide how the space will be used, confirm local rules, evaluate the land, understand utility requirements, and create a realistic budget before construction begins.
Whether the tiny house is built on wheels, on a permanent foundation, or as an ADU, the most successful result is one that is legal, safe, comfortable, and built to last. With the right planning and the right professionals, a tiny house can become a practical living solution that makes smart use of space without sacrificing quality.
Homes for sale in Mesquite, Nevada
Thinking about a move to Mesquite?
Browse every active listing — Sun City 55+, golf-course homes, new construction and more — updated multiple times a day. Or talk to a local agent who knows the neighborhoods.
Keep reading
More from the blog
How Jamali Garden Helps Homeowners Create Curb Appeal
Premium Windows & Doors for Mesquite, NV Homeowners